Tuesday, 26 February 2013

Playing with my new toy

Thank you everyone for all the lovely birthday wishes you left for my son on Sunday. We did actually manage to speak to him via Skype in the evening. We could not get a very good picture but it was great to hear his voice. They have driven down to Charleston, South Carolina for a few days and he has played some fab golf courses. Their drive down the East coast of the States continues.

It has been so cold recently that it has not been possible to get out into the garden nor out to my studio. I really miss my garden and the feeling the warmth of the sun on my skin.  At the weekend we decided to light set the fire had a roaring fire which I always enjoy.
It was also time to do some crafting indoors.
As you will remember my Hb bought me a Sizzix die cutting machine for Christmas and oh my have I been having fun with it. I have made a small start on buying some dies as they are quite expensive. I was given a Christmas bonus at work which I used. I will need to wait for my birthday before I can add some more to my collection.


As many of my blogging buddies are not card makers this is what I am talking about.
Meet my Big Shot!

I have made several new cards using my new toy and at the weekend I made a Card for the Lili of the Valley 9th birthday competition. As you all know LOTV are my favourite stamp makers and I have bought several including their wonderful sentiment stamps. I really like digital stamps but there is nothing easier than having a real live stamp to place just where you want it. No firing up the computer, sizing, re sizing etc! Just stamp and colour.

This is my card


It features one of the first stamps I bought nearly 3 years ago called Dandelion Clock and she is still one of my favourites.


 I coloured her with my Promarkers and highlighted with Prismacolor pencils. There is plenty of glitter too! You can also see my Madera Corner Memory box die cuts in the corners.  I used the round and round scallop Spellbinders to out my stamped image. The backing papers are from my stash. I have added some yellow Baker's twine and a spotty yellow button. The little tag sentiments are another favourite of mine from LOTV.  I have put it up for sale in my Etsy shop here


I would like to enter my card into the following challenges;

Lili of the Valley 9th Birthday blog hop There are lots of fab prizes over there.
Totally Papercrafts Hope for spring #155
Creative Card Crew Birthday #30
Inky Chicks Mother's Day or Birthday #4
Joanna Sheen Layer it up
Party Time Tuesdays Anything goes #109
Bearly Mine anything goes #75
Crafty Ribbons Button up #39
Top Tip Tuesday Tag
Cutie Pie Challenge  Pretty Pastels

In contrast to the photo of the roaring fire I have been bought several lovely bunches of my favourite daffodils which are cheering up my house.


and Billy seems to feel that it is still far too cold to go out in the garden so he has been snoozing away in
some of his favourite places indoors.

I also have some very exciting news that I have been asked to be a Guest Designer by Penny Black and More for March. I was really thrilled to be asked.  I will be back on Sunday to show you the card I made for their new challenge. Without giving anything away it took me out of my comfort zone ;0)
In the meantime why not take a leaf out of Billy's book and just try virtual hibernating until spring arrives ;0)

Back soon,

Bye for now,

Jane x

Sunday, 24 February 2013

Birthday wishes to the USA

No I have not gone totally mad. I know it is not July 4th, American Independence Day, but it is my son's 24th Birthday today and he flew off to the States on Thursday. For the first time since he was born I will not be able to wish him a "Happy Birthday" in person. Instead for the next 10 days he is driving down the East coast of America with his golfing friend. They met when they were young lads of 9 when they joined the local golf club at the same time. They are catching up with friends who are still studying out there and also fitting in some quality golf time.

We decided to have a small pre birthday celebration on Monday and although it was not appropriate to have a birthday cake I decided that cup cakes were in order so it was time to do some more baking with Billy.
Only this time I think Billy was more interested in sleeping than helping.
I had one of those "light bulb" moments in bed when I thought that I could use the American flags and stars as the theme for my cakes.


I downloaded a "free"  image from the computer, sized it and printed several out.


I cut them out and attached them to cocktail sticks. I also printed a couple of messages which I also made into little flags.


It was then time to make my stars for the tops of the cakes. I already had some coloured fondant icing and luckily the colours that I had not opened were the red, white and blue.


I rolled the icing out quite thinly and used my set of 3 star plunge cutters to cut out lots and lots of red, white and blue shapes.


Here are the blue ones in all three sizes.
I was able to get this all out of the way last weekend. I was able to bake the cakes on the Sunday evening  so that all I had to do when I got home from work on the Monday afternoon was to quickly ice them.


So on Monday after work I made up some butter icing and piped it onto the cakes, adding the little stars and placing the flags on top.

If you remember my Baking with Billy post you will remember that I made a quick cake stand by standing a plate on a cup. Well I found 2 great glass plates in a shop recently. They are new pressed glass but they have a really vintage look and feel to them, and they only cost £7 for the pair. I was able to use these new glass plates with a cup in between to make my cake cake stand.
They sat in the middle of the party table and were enjoyed by us all. We had great fun and enjoyed all the food. 


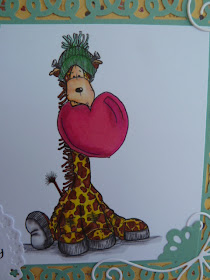
My card today is his birthday card which I hope he remembered to pack. I will let you into a secret, Matt has always had a "thing" about giraffes and his very first soft toy was called Yellow Horsie which is actually a giraffe (no we also don't know how that one happened!). As a little boy he had all things giraffe and although he is now a grown man with his own flat and business I thought I would make something to remind him of home and of past Happy Birthdays. I looked long and hard for a giraffe stamp and eventually found a wonderful one by Teddy Bo. 


How cute is that giraffe ;0) Matt often wears a woolly hat so it is quite appropriate too. Also his favourite colour is green so I used that as my contrast colour.  There is a lot of love (and some dollars inside) packed into his card. I have used my Promarkers to colour the image. The super cute giraffe backing paper is by First Edition called Animal Antics. The gorgeous frame has been cut using my MS punch around the page punch which my Darling Daughter brought home for me from her Honeymoon last year. The sentiment is computer generated and I have cut it out using a Spellbinders die cutter. You will also spot the Memory Box bow die cut and the QuicKutz photo corner die.

I would like to enter my card into the following challenges;
Natalie and Amy Something old/new #6 The old is my backing paper and my new is the stamp (in fact most of the rest is new!)
Stamping Sensations Fur and Feather
Creative Card Crew #30 Birthday
Jelly Park Get in shape - Use different shapes on your card
Crafty Catz Dies and punches
Allsorts #195 animals
Pan Pastels Happy Birthday #8
Allsorts animals #195
Joanna Sheen Layer it up
Cupcake Inspirations Challenge 199 I have been inspired by the colours of the photo
Cutie Pie #38 pretty pastels
ABC card challenge H for Happy Birthday
My Mum's Craft Shop Love or Valentine
A+T emerald Faeries Love #40
Craft Room Challenge something for a man

Although he does not read my blog  I am sending Birthday Wishes to the USA for my Boy xxx
Can I ask my American blogging buddies to sing "Happy Birthday" at the tops of their voices and maybe, just maybe, he will hear it as he drives down the East Coast of America from Charlottesville towards Florida ;0)
Over here it really has turned freezing cold ago and there have been some flurries of snow too. He has chosen a good time to get away. 

Thanks as always for your kind visits and can extend a very warm welcome to the new followers who have recently joined me. It is great to have you here.
Keep warm and carry on crafting,

Back soon,

Bye for now,

Jane x

Thursday, 21 February 2013

Signs of spring

That gorgeous golden orb in the sky, aka the sun,  has been making some fleeting appearances over the last couple of weeks. It made me realize how little sunshine we have had for so many months now. Luckily the sunshine has coincided with my days off including a visit to see my parents. We went to our favourite garden centre, Coolings, near Knockholt in Kent for lunch. I was delighted to see so many spring plants on show.
How cheery all these primroses look


There were also lots of pots of my very favourite flower, the daffodil. The flower buds are just about ready to burst open and reveal their golden jewels inside.


I was also delighted to see some snowdrops in flower, they have such very dainty blooms. Mine in my own garden this year seem to be blind? I'm not sure why. Perhaps they are resting this year.

I also spotted some wonderful helebores in the grounds of the garden centre.


These little bursts of sunshine have certainly recharged my batteries a little. I brought home a lovely primula which is now sitting on my kitchen side.


I also noticed yesterday evening that it was not getting dark until nearly 6pm and that we are getting some daylight when getting up for work. Bliss, there really are signs of spring.

For my challenge card today I am going to continue with something cheerful and bright.

I have used my Lili of the Valley "Never too old for cupcakes" stamp which I have coloured using my Promarker pens.


It is a gatefold card with the inner flap and the inside all decorated. I have used lots of embellies on this card including MS hand punched butterflies, lace and mulberry flowers all glitzed up with plenty of glitter.


 One last photo showing how the card opens out. I also added some Dimensional Magic to the cupcake wrapper. The sentiment and the tags are all LOTV.

I would like to enter my card into the following challenges;
Papertake weekly Buttons/bling I have gone for bling..and plenty of it!
Top Tip Tuesday Tag - you're it
Cutie Pie Pretty Pastels #38
Bearly Mine #74 lace, ribbon or twine
Inky Chicks Mother's Day or birthday #4
Visible Image Love
Pretty Little ribbons
Allsorts Things with wings
Heck of a challenge Love and flowers
Lili's Little Fairies Butterflies
Divas by Design Fancy fold

I am really enjoying seeing lots of signs of spring on other people's blogs too. I don't think we are quite there yet as there are some more cold ones over the next few days and the frosts have been quite thick in the mornings but little by little it is getting closer. Another week has just flown by so we will be there before we know it. Have a great upcoming weekend, keep snug and keep crafting.

Back soon,


Bye for now,

Jane x


Saturday, 16 February 2013

Pearls

I am sure that lots of you have photos and posts which you planned to write and just never got round to. I was looking through my photos and realized that  I never shared a wonderful visit to West Mersea with my daughter the summer before last. I also thought it would be a really good time to share some sunshine. West Mersea in Essex is world famous for it's oysters and until that day I had never tasted this delicacy which I know people either love or loath.
Just look at the sunshine we had that day. It was actually just before they moved from Essex to Southampton. My girlie and I love looking for shells and the beach was just stacked with oyster shells. We collected some as they are great for using as props for photographing my jewellery.


There is nothing like warm sand on your toes is there?
After wandering along the beach we made our way to the famous West Mersea Oyster bar for lunch. It gets very busy so went quite early to ensure a seat.
As it was such a gorgeous day we chose to sit outside. It was also lovely to admire the views.


.


There are no guesses of course for what I ordered......


Now I know that a lot of people don't like oysters even if they like seafood.....well here was my verdict.


mmmmmmm, yummy. In fact it is making my mouth water remembering that glorious taste. Seeing these photos again really takes me back to that superb sunny day with my girlie. Happy warm summer days. Let's hope we get plenty of them this year.
Now those shells we found have been put to great use as props as I have been playing in my photo tent again.

This is the newest edition for sale in my Etsy shop
Of course I could not mention oysters without pearls could I and I have been making some new pearl based necklaces too ...I know the shell below is not one we found but I rather liked this photo of another new necklace in my Etsy shop. This is a bamboo coral and freshwater pearl summery piece... roll on summer.
and more shells and pearls in this piece

and last but not least is my card challenge card for today which also has the theme of  the seaside and pearls. I used the second mermaid Lili of the Valley mermaid stamp which I recently won. This stamp features 2 cute fairy mermaids and I added lots of pearls (card making ones) to this.


Aren't they cuties? 

I used my Promarkers for colouring and added Stickles glitter to their wings and tails and pearls to the starfish. The oval die is Spellbinders Floral Oval. My shell die cuts are Marianne (they are great fun and there is one more in this set too) and the tag sentiments are LOTV. 

I would like to enter my card into the following challenges;
Lili's Little Fairies Pearls (how very appropriate)
ABC challenge H is for Happy Birthday
Marianne Design Divas Favourite colours my favourite colours are these  pastels. I really like the pinks, blues and creams. I am never a pink girl but I do love it with blue and cream. The Marianne die cuts I used are the sea shells LR0230
Cute Cards Thursday an eye for detail #256 I love the details I have added to my stamped image..glitter and little pearls.
Forever Friends Fortnight challenge anything goes #55
Penny Black and More Pink, Pearly and Swirly
I love Promarkers One for the girls #155
Deep Ocean Challenge B is for .... my Bs are birthday, bow, blue, brown and bubbles
Natalie and Amy something old/new my old is the lace and my new is the LOTV stamp
Make It Monday Linky Party #127


I hope my post has triggered some summer sunshine memories for everyone and let's hope spring arrives really soon. I would like to say hello to my newest followers :0) and as always a thank you to everyone who visits me here. Here in Surrey I have woken up this morning  to some sunshine and it looks to be dry for the whole weekend. We may well get out on the walk we never managed last Sunday! Have a wonderful weekend and I hope the sun puts in an appearance at some point wherever you are.

Back soon,

Bye for now,
Jane x


Sunday, 10 February 2013

A wet Sunday in a tent

Ha ha.......I am sure that you had been expecting to see photos of me trying to camp outside?

Seriously you will not see that, I think I have an allergy to camping. It was fun as a girl guide but a grown up girl needs a little luxury. No the tent that I have been playing with this weekend is none other than a photo light tent. I am quite pleased with the results.

As it has been such a wet weekend our planned walk was rained off. Instead I decided it was time to make a few new pieces of jewellery and to photograph them for my Etsy shop. I have put the above piece up for sale in my Etsy shop here

 At this time of year the light is so poor that I really struggle with my photos and my usual spot on the kitchen side in front of the window just does not work. I own a really good little compact camera the Panasonic Lumix DMC-TZ8 (which sadly in no longer made). Although I really enjoy taking photos I have no expertise  at all and I know that photographing jewellery is very difficult. There is an awful lot of reflection to deal with. I have been doing some research and also messaged some of my crafting making friends to see what they do. Some have every elaborate photo tents with lights etc but I wanted something which is quickly assembled and easy to use. I really don't have the time or space to have elaborate set ups.

I even looked at the good home made light boxes shown on the Internet using cardboard boxes and tissue paper. They seem to work well but cannot be stored away. What I eventually bought was this.


It cost £14.99 from Maplin and folds completely flat. I also bought some muslin and some pure white A2 card.
The tent does come with white surrounds and a choice of blue or grey at the base but I found this was not enough to give good results.


The packet unfolds and the sides are held up with velcrose tabs.
I just stood it on the desk in the spare bedroom (which is west facing) and draped the muslin around the sides. I cut the card to size and placed it in the base.

I also tried using a pretty rosebud floral print material background for some of my cards. This was originally a dolly blanket I made for my daughter!


This is the floral print.

 I decided to have a play and started clicking away with my camera. I took photos of the new jewellery pieces I had made.


I then put some of them into Picmonkey (a free on line photo editor)  to edit and I was impressed that even on such a dismal day I managed to get some usable photos.

On sunny days and when I am in a hurry I shall just keep using my kitchen side but on those dismal winter days like today I think I will be "camping" with my tent ;0)


Here are the end results in collage form


 I have started photographing my cards in my tent as well and here is my card challenge card for today

You can see that with this one I used the floral back ground. This card is in fact my Hb's Valentine card....shhhh don't tell him.


Here is a peep inside showing the heart edge I made using my MS punch. The image is again the sweet Bella Sleeping by Wild Rose Studios. This stamp can be used for so many occasions. I coloured the image with my trusty Promarkers. I added lots of my new die cuts and finished off with some gems and a lush black organza ribbon. I love red and black as a colour combo.

I would like to enter my card into the following challenges;


Totally Papercrafts Love/Valentine #153
Raise the Bar A pair of something #130 my pair is this sweet pair of Elephant trunks!
Pretty Little Ribbons  Anything Goes #19
Pan Pastels Love and Romance #6
A+T Emerald Faeries Love #40
Crafty Catz Love #169
Inky Chicks Valentine or anniversary #3
Party Time Tuesday Love and Romance #106
Simon Says Stamp have a heart
Visible Image Love


I would also like to mention that the Ribbon Girl are hosting a give away over at their blog here There is a lovely bridal and bling package up for grabs if you leave a comment over there.

I hope that for those of you in the UK this wet weekend has allowed you some quality crafting time? I also hope my american friends have not been affected by the awful snow storms we have been watching. I have never seen so much snow fall in one time. I also  hope my post may have also given you some helpful information regarding photo light tents? As I type this the rain seems to be even heavier....at least we will be spared a hose ban this year! Have a great Sunday evening and a good week ahead. Thanks as always for you lovely visits and kind comments that you take the time to leave.

Back soon,

Bye for now,

Jane x