As you well know I have been an admirer of the professor of all things inky, Tim Holtz for over 10 years. I use his products on every single thing I make, even if it is just to distress ink the edges of a card. His creativity and enthusiasm for crafting is endless and he has continued to inspire me over the years through all his work; his annual tags he made, his amazing new products and I was even lucky enough to attend one of his workshops in the UK 3 years ago. If you missed that post you can see it here . During lockdown there was one good thing that happened in my inky world, the weekly Facebook Lives which he gave . He so generously gave up his time over 18 weeks to share tips and tricks, 8 of which were Q and As on products which were so useful. They were a joy to watch and are still available on his Facebook page or website to view now. He also
encouraged everyone to be inspired by his techniques, to get creative and to upload makes to Instagram using the #timholtzdemo. I loved being involved and joined in with thousands of crafters world wide. I had heard Tim mention that each week he would choose 3 winners but that was not why I joined in. As you all well know being creative and getting inky is what makes me me. I needed no excuse to get involved.
encouraged everyone to be inspired by his techniques, to get creative and to upload makes to Instagram using the #timholtzdemo. I loved being involved and joined in with thousands of crafters world wide. I had heard Tim mention that each week he would choose 3 winners but that was not why I joined in. As you all well know being creative and getting inky is what makes me me. I needed no excuse to get involved.
What I didn't expect was to be chosen as winner in June. You could have knocked me down with a feather when I got a message from Tim telling me and also letting me chose a stamp set to go with my prize. I was so excited and although the mail during this awful pandemic was a while coming my wonderful prize arrived last week.
Just look at my goodies.

But best of all Tim also included one of the tags he had made during the Lives...and I could not believe that it was my favourite of all those he made.

I have a " thing" about images of toadstools (as well as pigs, mermaids, the Man in the Moon, Father Christmas, snowmen, strawberries and sea shells, OK now you know all my secrets!). In fact when I saw Tim make this tag it inspired me to buy the gorgeous field notes ephemera pack to go with my field notes stamp set (one of my most used sets of this summer).

I will treasure it.

The stamp set I chose for my prize was The Professor 2...for me it would be a reminder of such pleasant crafting times.

I decided that my first make with this set would be something I could keep and look back at.
I thought I would also blog and share a step by step for this make to give something creative back.
I chose to work with alcohol inks as they are such a fun medium and I managed to finally buy some more Yupo. WARNING; there are lots of photos so if you just want to see my finished project please scroll to the bottom of the page.
I have shared all my tags and makes over the summer on my Instagram page here. I don't blog everything I make as much as I love blogging it would occupy far too much of my creative time. So if you would like to see what I am up to I would love to see you join me over there.
So this is what I got up to.
I used red and blue alcohol inks on Yupo for my background as I knew I would get some dark purple in there too. I wanted to challenge myself to do something very different.
 I die cut myself a tag from this background and also a plain white cardstock tag. I used the fun lift ink technique (you can check the process out in Tim's videos.) I have always enjoyed this technique since Tim first shared it and the ink a few years back. I knew I would get a dark and light version of my stamping so this sparked my ideas for my pair of tags.
 They would be the "dark" and "light" versions of my crafting. I think Tim heads toward the "dark and grungy" and I head more toward the lighter side! I got a "ghosted" image left on the alcohol ink background and then stamped the ink taken off onto my white tag. I I added a few distress inks to my "light" tag and some remnant rubs to both. My "dark" tag had the No 13 and the "light" had butterflies and the No 12.


Once painted with some distress inks and glossed with glossy accents they really come to life. I also like adding some glitter pen to the butterfly wings before glossing them.
 We have also recently finished watching "Dark" on Netflix. We loved it but boy is the plot confusing until virtually the last episode of season 3! I give nothing away but I was inspired to add the concept of time travel so I added some cogs and clock hands.

 One butterfly was playing with the settings !
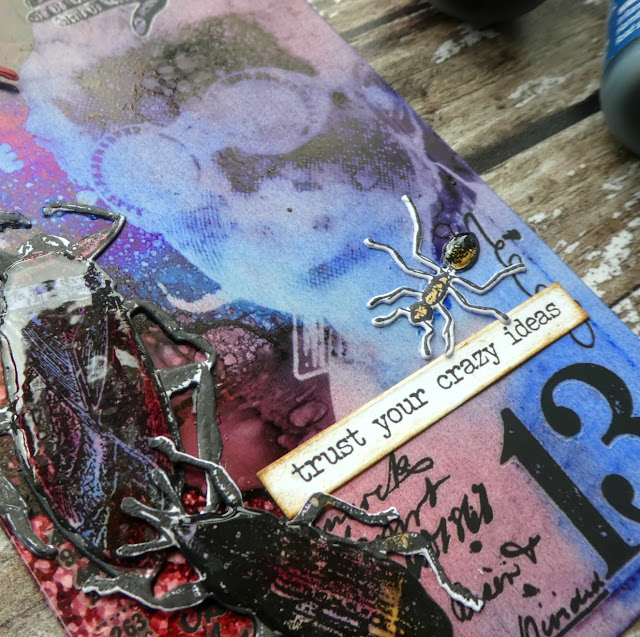
 The beetles and ants walked onto my dark tag . I thought the "stamp here" was a fun pun.....but no I would never stamp on such a beautiful beetle, I am also a lover of spiders too!


 However the beetle and ant are busy turning back time. I'm not sure which I prefer!




I would like to enter my tags into the following challenges
Simon says stamp Monday grunge it up
A vintage journey tag you're it
Creative artiste anything mixed media
So huge thanks to Tim for his kindness, creativity and generosity and to Mario for all he does behind the scenes. Thank you guys, you really do rock. 2020 will certainly be a year to remember.
Thanks to everyone who read through to the end of this rather long post!
Take care, stay safe.
Back soon,
Bye for now,
Jane x
I thought I would also blog and share a step by step for this make to give something creative back.
I chose to work with alcohol inks as they are such a fun medium and I managed to finally buy some more Yupo. WARNING; there are lots of photos so if you just want to see my finished project please scroll to the bottom of the page.
I have shared all my tags and makes over the summer on my Instagram page here. I don't blog everything I make as much as I love blogging it would occupy far too much of my creative time. So if you would like to see what I am up to I would love to see you join me over there.
So this is what I got up to.
I used red and blue alcohol inks on Yupo for my background as I knew I would get some dark purple in there too. I wanted to challenge myself to do something very different.


I wanted to add some of my entomology critters too. I have the stamps and dies for this set and it has provided endless fun for me this summer. As you well know I am girl who always loves adding details and stories to my crafting.


I finished each off tag with a very apt tiny talk sticker.
Here are my finished tags.


My light tag has the butterflies and bee happily making time fly (the hands are movable)


Here is one final shot of the pair.

I would like to enter my tags into the following challenges
Simon says stamp Monday grunge it up
Creative artiste anything mixed media
So huge thanks to Tim for his kindness, creativity and generosity and to Mario for all he does behind the scenes. Thank you guys, you really do rock. 2020 will certainly be a year to remember.
Thanks to everyone who read through to the end of this rather long post!
Take care, stay safe.
Back soon,
Bye for now,
Jane x