Wednesday 30 March 2022

How to make an artist trading card Jane's way!

 Hello, it's time for my fortnightly blogged design team make for Visible Image. You may or may not be aware that I organize a monthly artist trading card swap over in the customer Facebook group which will be celebrating a whole year of swapping next month. Whether you are a new stamper or a seasoned one you are most welcome to join us. Over 80 people, worldwide, have taken part since it started. It's been such fun and it's so lovely to receive a unique piece of art from your partner in the post. 

 I get asked lots of questions about how to make ATCs;  what cardstock to use, how to design, what to put on the back etc so I thought today I would run through how I approach making my own ATCs. This might help anyone who is still thinking about joining in with the swaps and doesn't know where to start or for anyone who is having a bit of a creative "block". Hopefully this might kick start your creativity. This is obviously my own personal way of making them, there is no right or wrong way.

So let's start at the very beginning. Artist trading cards (ATCs) were designed to be fun and swappable. They are tiny unique works of art to be traded never sold. An ATC must measure 3 1/2  by 2 1/2  inches. This is the “standard” for them. For our swap on the VI page only VI stamps, stencils and dies can be used but all the inky products are up to you. Every month I set a theme as personally I find this easier to create for rather than "anything goes". 

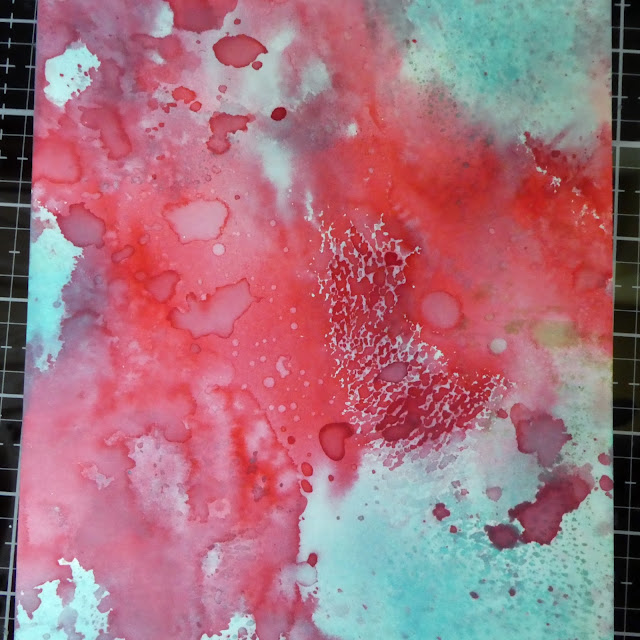
For March the theme for our swap was "signs of spring". So the first thing I did was to chose spring coloured inks and Visible Image products.

 I went with the gorgeous 

Daisy Daisy stencil

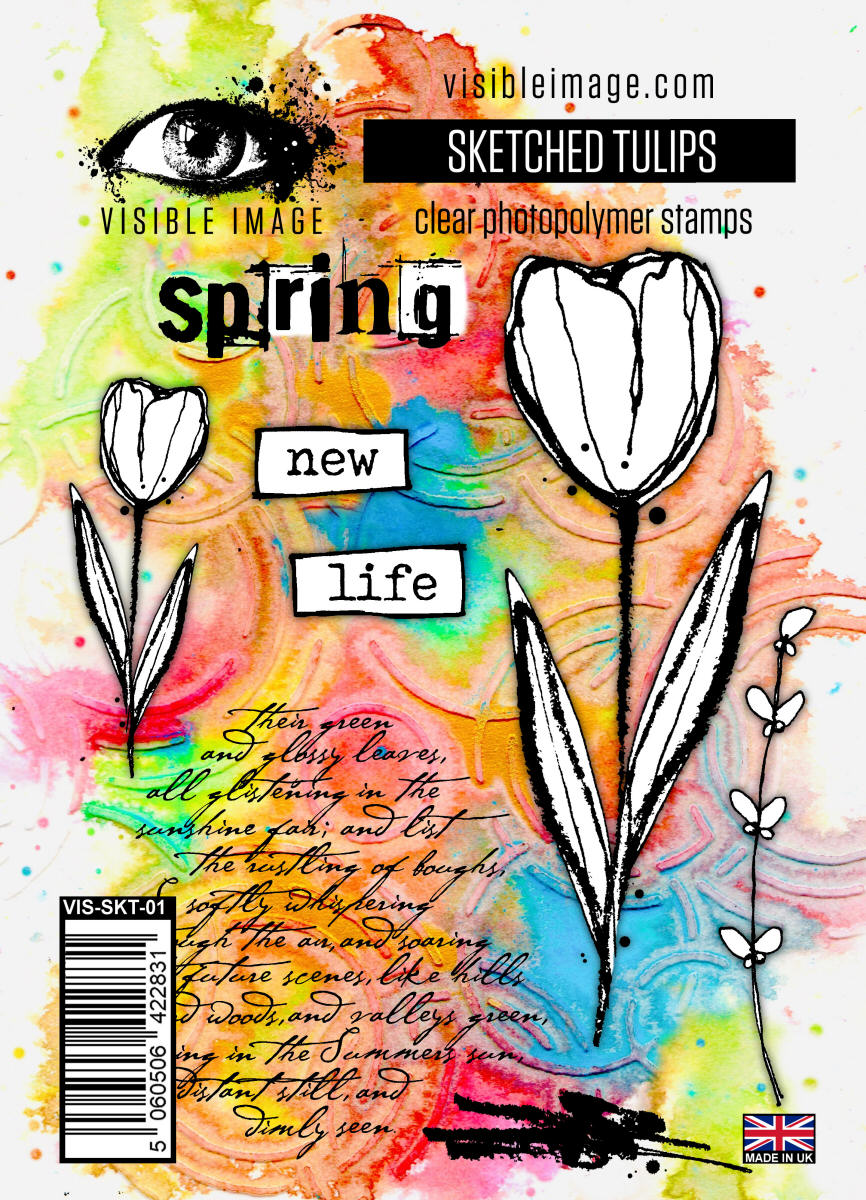
and for me, the perfect spring stamp set; 

My go to inks are always distress inks and I chose cracked pistachio, squeezed lemonade and twisted citron as my spring inspired colours. I used a piece of A5 white 300gsm smooth cardstock put the stencil in place then blended through the 3 colours using a foam blending tool. I moved the stencil round the edges of the card and added extra ink in any gaps.

The Visible Image Facebook group swap is for a single ATC but I always make 4 as I keep one, give one to my granddaughter (who is also called Daisy) and the 4th goes to a lovely crafting friend abroad who I swap with. So I cut four  3 1/2 by 2 1/2 inch  ATC backgrounds from my piece of card. 

You can design ATCs in either landscape or portrait format and I often do 2 each way. I added a little background stamping to each ATC using the gorgeous script stamp in the tulips set and peeled paint distress archival ink. Just put the stamp in your hand, dab on the ink and stamp randomly. The more incomplete and random it is, the more it blends into the background. 


I stamped the small tulip and words onto white card using Versafine black onyx ink and clear embossed.  I coloured just the flower of the tulip with orange zig watercolour pens. I cut them all out. 
Next I stamped the word "spring" on each ATC and lined up the small tulip and stamped it above. I also stamped the little blossom sprig in the set using fossilized amber distress archival ink 
Finally I adhered the cut out tulips and words in place. As a finishing touch I inked the edges with vintage photo distress ink.

Here they are finished. 


As you can see I like to make all four slightly different so that they are all one of a kind. Here they are as a group.

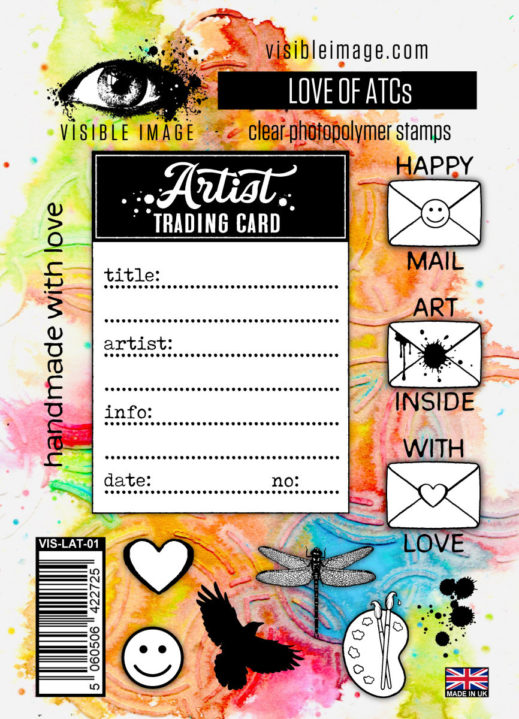
The ATCs need to be at least 300gsm thickness to make them sturdy. Even though my cardstock is quite thick I add a backing layer of kraft card cut from the inside of a Weetabix box. I cut it just a tiny bit smaller than my ATCs. It can be plain white or coloured card but I find Weetabix kraft card works really well and is free for me! People often write on the back of their swaps the details, date etc of the swap and Visible Image have a fabulous ATC set which I stamp on the backs of mine.

It's called the Love of ATCs stamp set

Not only does it have a stamp to add all the info to the back of ATCs but it has some fun stamps for decorating your envelope if you would like to. 

So here is what the back of my ATCs look like


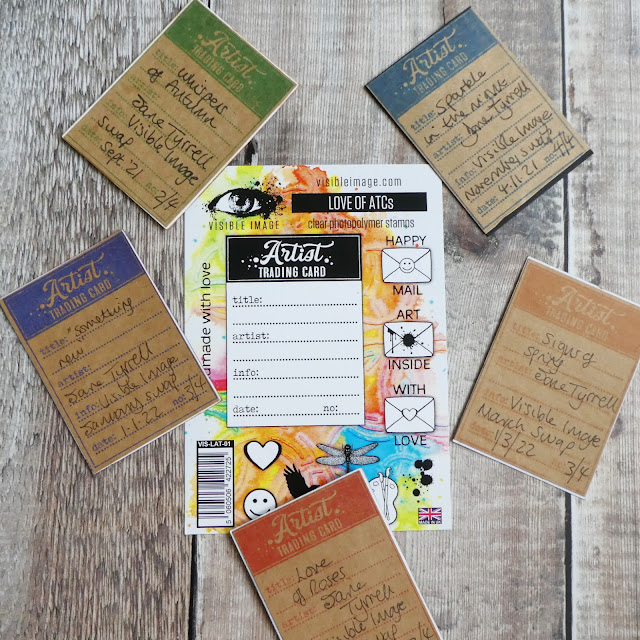
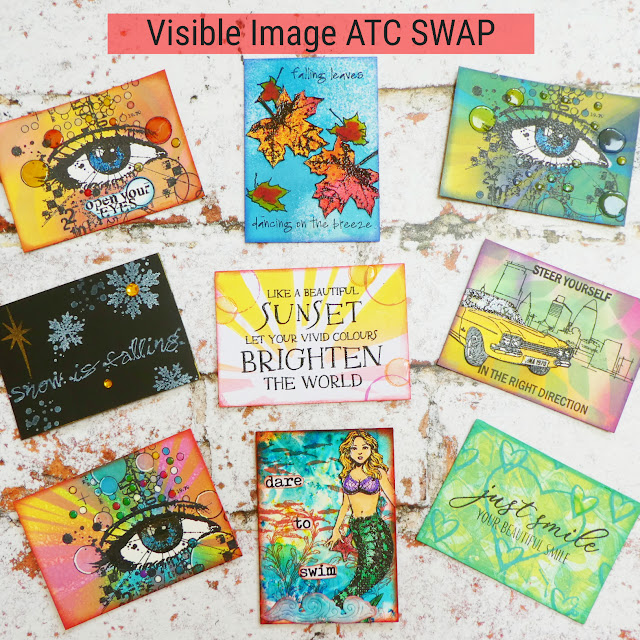
Lastly here is a photo of 6 my 12 ATCs I have swapped in the group since last May. Some have gone abroad, others have a home here in the UK. 

I hope I might have answered a lot of your questions and perhaps even inspired you to join our next swap? The sign up for the next swap will open on 23 April, if you would like to join us. And a little heads up that there might be a little "something" up for grabs to celebrate our first year of swapping! 

All the Visible Image links are listed below;

The Visible Image Group page is over on Facebook. Our friendly Group is here ...it would be lovely to see you. You will see lots of gorgeous makes by the DT and customers to inspire your own creativity. 
The main Visible Image Facebook business page is here

Visible Image also has its own You Tube channel here where you can see videos and Lives to give you lots of inspiration and ideas. 

Their Instagram page can be found here 

Pinterest here

and their website is here.

 You will also find me on Instagram here; @jane.tyrrell where I share many more samples than I have the time to blog.

Back soon,

Bye for now. 

Jane x

Wednesday 16 March 2022

My love of the Man in the moon...and some photos of the Ally Pally show

Hello, it's time for my fortnightly blogged design team make for Visible Image. 

Today I am sharing a make using one of  the 3 gorgeous new layering dies, 

Torn fishnet die 


and the Midnight sky set (yes I do love the man in the moon so much!) Now when I first said I was using this set with the net die to make a canvas I think Helen wondered how on earth I would combine them....well I had a plan! 

I was inspired by a nursery rhyme/fairy tale book that I remember from my childhood which had something about catching the moon in a net, so that is where I went with my make and my very vivid imagination!

I die cut 2 of the "nets" using white glossy card

I added a little villainous potion distress ink


I made a distress ink background using these awesome distress ink colours

Using pieces of inky mop up card from my stash I stamped and cut out the moon,
 multiples stars which I gold embossed, and some planets
and one of the sentiments, which I cut up and matted onto gold and blue card.
I stamped and gold embossed the star swoosh stamp in the set on random areas of the background. I also stamped and gold embossed a few large stars. 
I stamped, gold embossed and cut out some large stars from inky mop up card.
Then I started putting my design together. 
I machine stitched around the edges.
Here is my finished canvas. 
with some close ups,


and one final shot.
I really did love making this and it will be given to my lovely Mum soon. She has always love everything about the Moon and it was she who instilled in me my love of the Man in the Moon! 

All the Visible Image links are listed below;

The Visible Image Group page is over on Facebook. Our friendly Group is here ...it would be lovely to see you. You will see lots of gorgeous makes by the DT and customers to inspire your own creativity. Whether you are a new stamper or a seasoned one you will be most welcome.  You will also be able to join in with the monthly Artist Trading Card (ATC) swap which has been such fun. We are now in the 10th month of swapping and have had over 80 people, worldwide, taking part. The sign up for the next swap will open on 23rd March if you would like to join us.

The main Visible Image Facebook business page is here

Visible Image also has its own You Tube channel here where you can see videos and Lives to give you lots of inspiration and ideas. 

Their Instagram page can be found here 

Pinterest here

and their website is here.

 You will also find me on Instagram here; @jane.tyrrell where I share many more samples than I have the time to blog.

Before I go I just wanted to share a photo of my weekend at Ally Pally demoing Visible Image for Country View Crafts, one of Visible Image's lovely UK stockists. On the Saturday it was so busy we didn't get a change to take any photos so this one was quickly taken first thing on Sunday before the show opened.

 I met so many lovely people including some from the VI Facebook group, it was great to put faces to names. Thank you to everyone who messaged me before and after the shows, your support is so appreciated. I think I "enabled" a lot of people to treat themselves to some new VI products 😉 Everyone said how much they loved attending a Live craft show after over 2 years of the pandemic. Country View Crafts have already booked a stand at the Stamperama show in Bedford at the Bedford International Athletic stadium on 25th September and yes I will be there to demo 😀So put the date in your diary and of course I will share the details nearer the time. 

Bye for now,

Jane x

Saturday 5 March 2022

More Mother's day inspiration

 Hello I am here with my 2nd design team inspiration make for our March challenge over at County View Challenges. The theme for the month is "Mother's Day. You can make anything you like using any products. You can enter a maximum of  5 times and into a maximum of 10 challenges including ours. As always there is a fab £20 voucher up for grabs for one lucky randomly selected winner to spend on the website.  You can find all the details of the challenge and more examples made by my talented teamies  here.

I have added clickable links within this post to the CVC website. If anything is out of stock just add your name in the email notification and Susan will email you when she has them back in stock. 

For this make I used the gorgeous Visible Image Butterfly effect set 

with the gorgeous new framed fibres layering die
The die cut Mum is from my stash.
This is what I got up to;
I cut the layering die out twice, in pink and white card to make a frame.

I stamped one of the sentiments at the bottom of the card front.

and sprayed the die with mica stains.

I stamped, coloured and cut out the large butterful...

and also the circle stamp in the set to stamp behind the panel.

The die cut Mum is from my stash.
I then put everything together....

Here is my finished card

with a couple of close ups


and one final shot.

 I hope I may have inspired you to join in with our March challenge. You can use any stamps/products, the choice is yours. 
 Once again all the details for the challenge are  Remember that when you buy from the Country View Crafts website UK postage is FREE on orders over £20.00 

Once again here you can find all the details  here.

I would love to see you over on Instagram where I share new creative makes nearly every day. This is my link/profile @jane.tyrrell
Sadly these days I just don't have the time to blog everything! 

Before you go I have some very exciting news that I will be demoing for Country View Crafts at the "Crafterama at Ally Pally" show on Saturday12th and Sunday 13th March. It is wonderful that craft shows are starting up again and I do love Alexander Palace. It is such an iconic place to host a craft show. So if you happen to be near London or fancy a day out I will be demoing Visible Image stamps and stencils plus the whole Tim Holtz distress range, including the awesome new colour, saltwater taffy (and more!) 
 Come and say hi, it would be fab to see you there.

Back soon,

Bye for now,

Jane x